Auth Code Flow
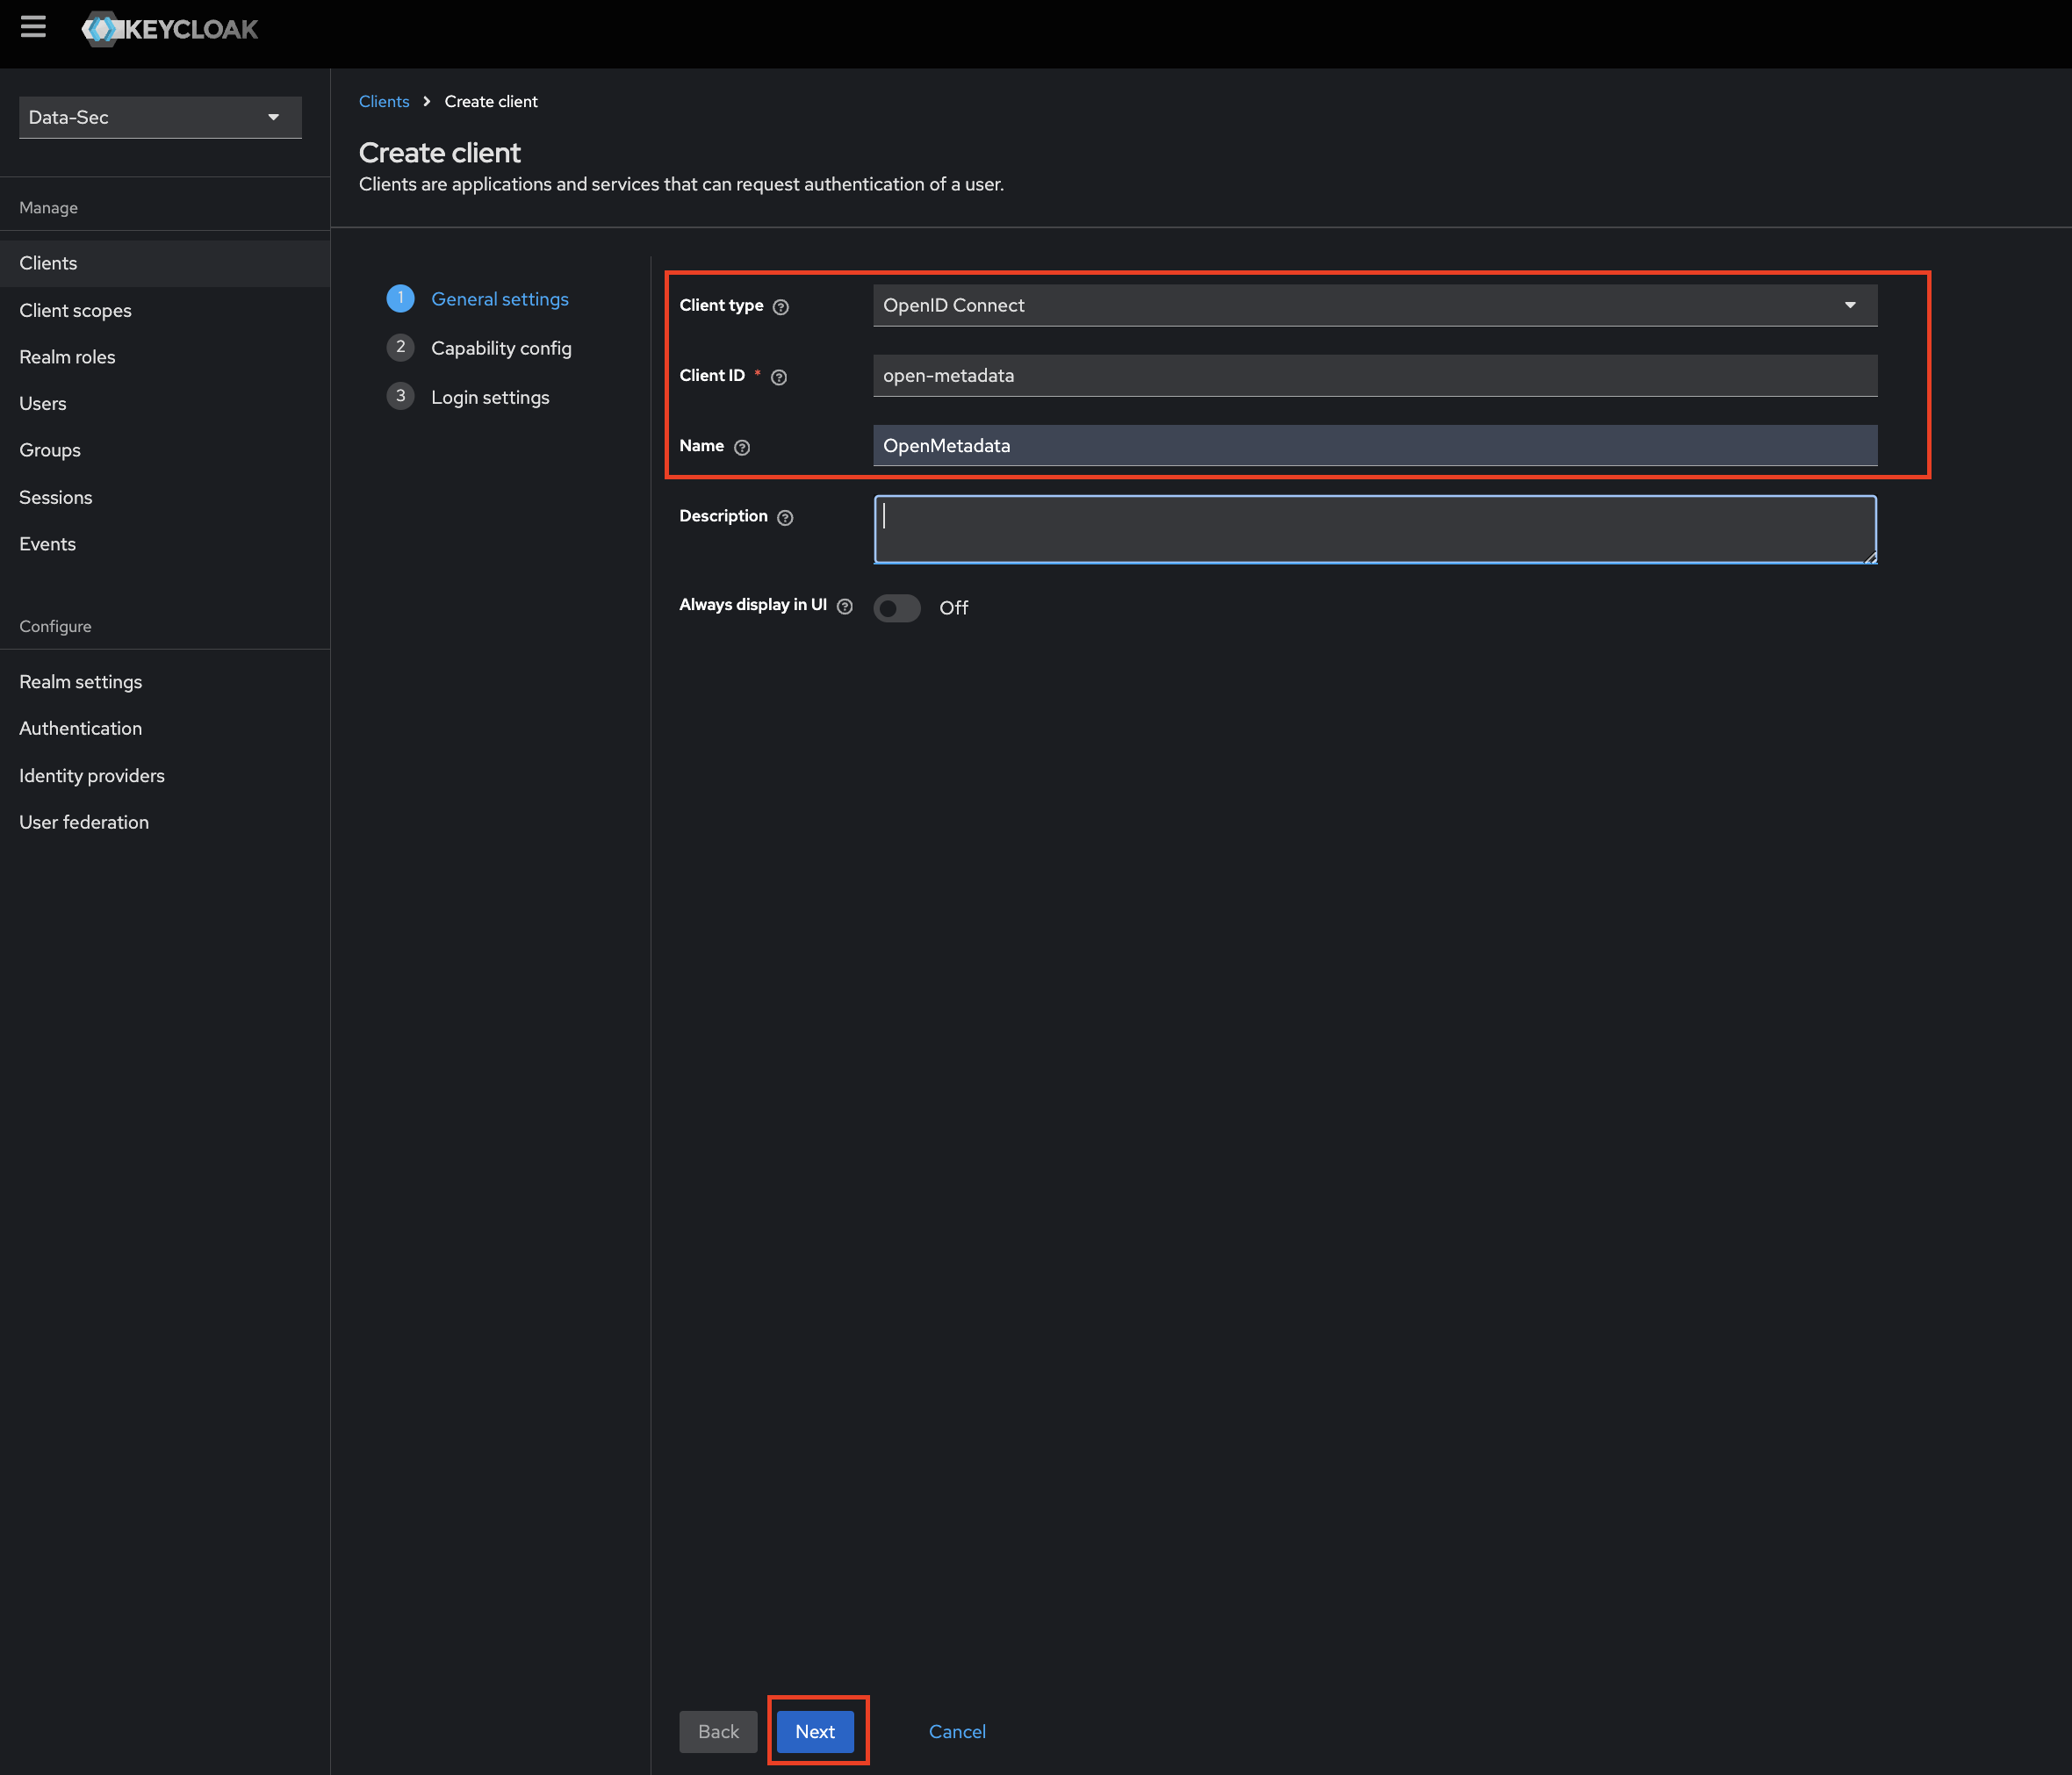
Step 1: Create OpenMetadata as a new Client
- Click on
Clientsin the menu. - Click on
Create Clientbutton. - Select the
Client type. - Enter the
Client ID. - Enter the Name and Description
(Optional). - Click on
Nextbutton.
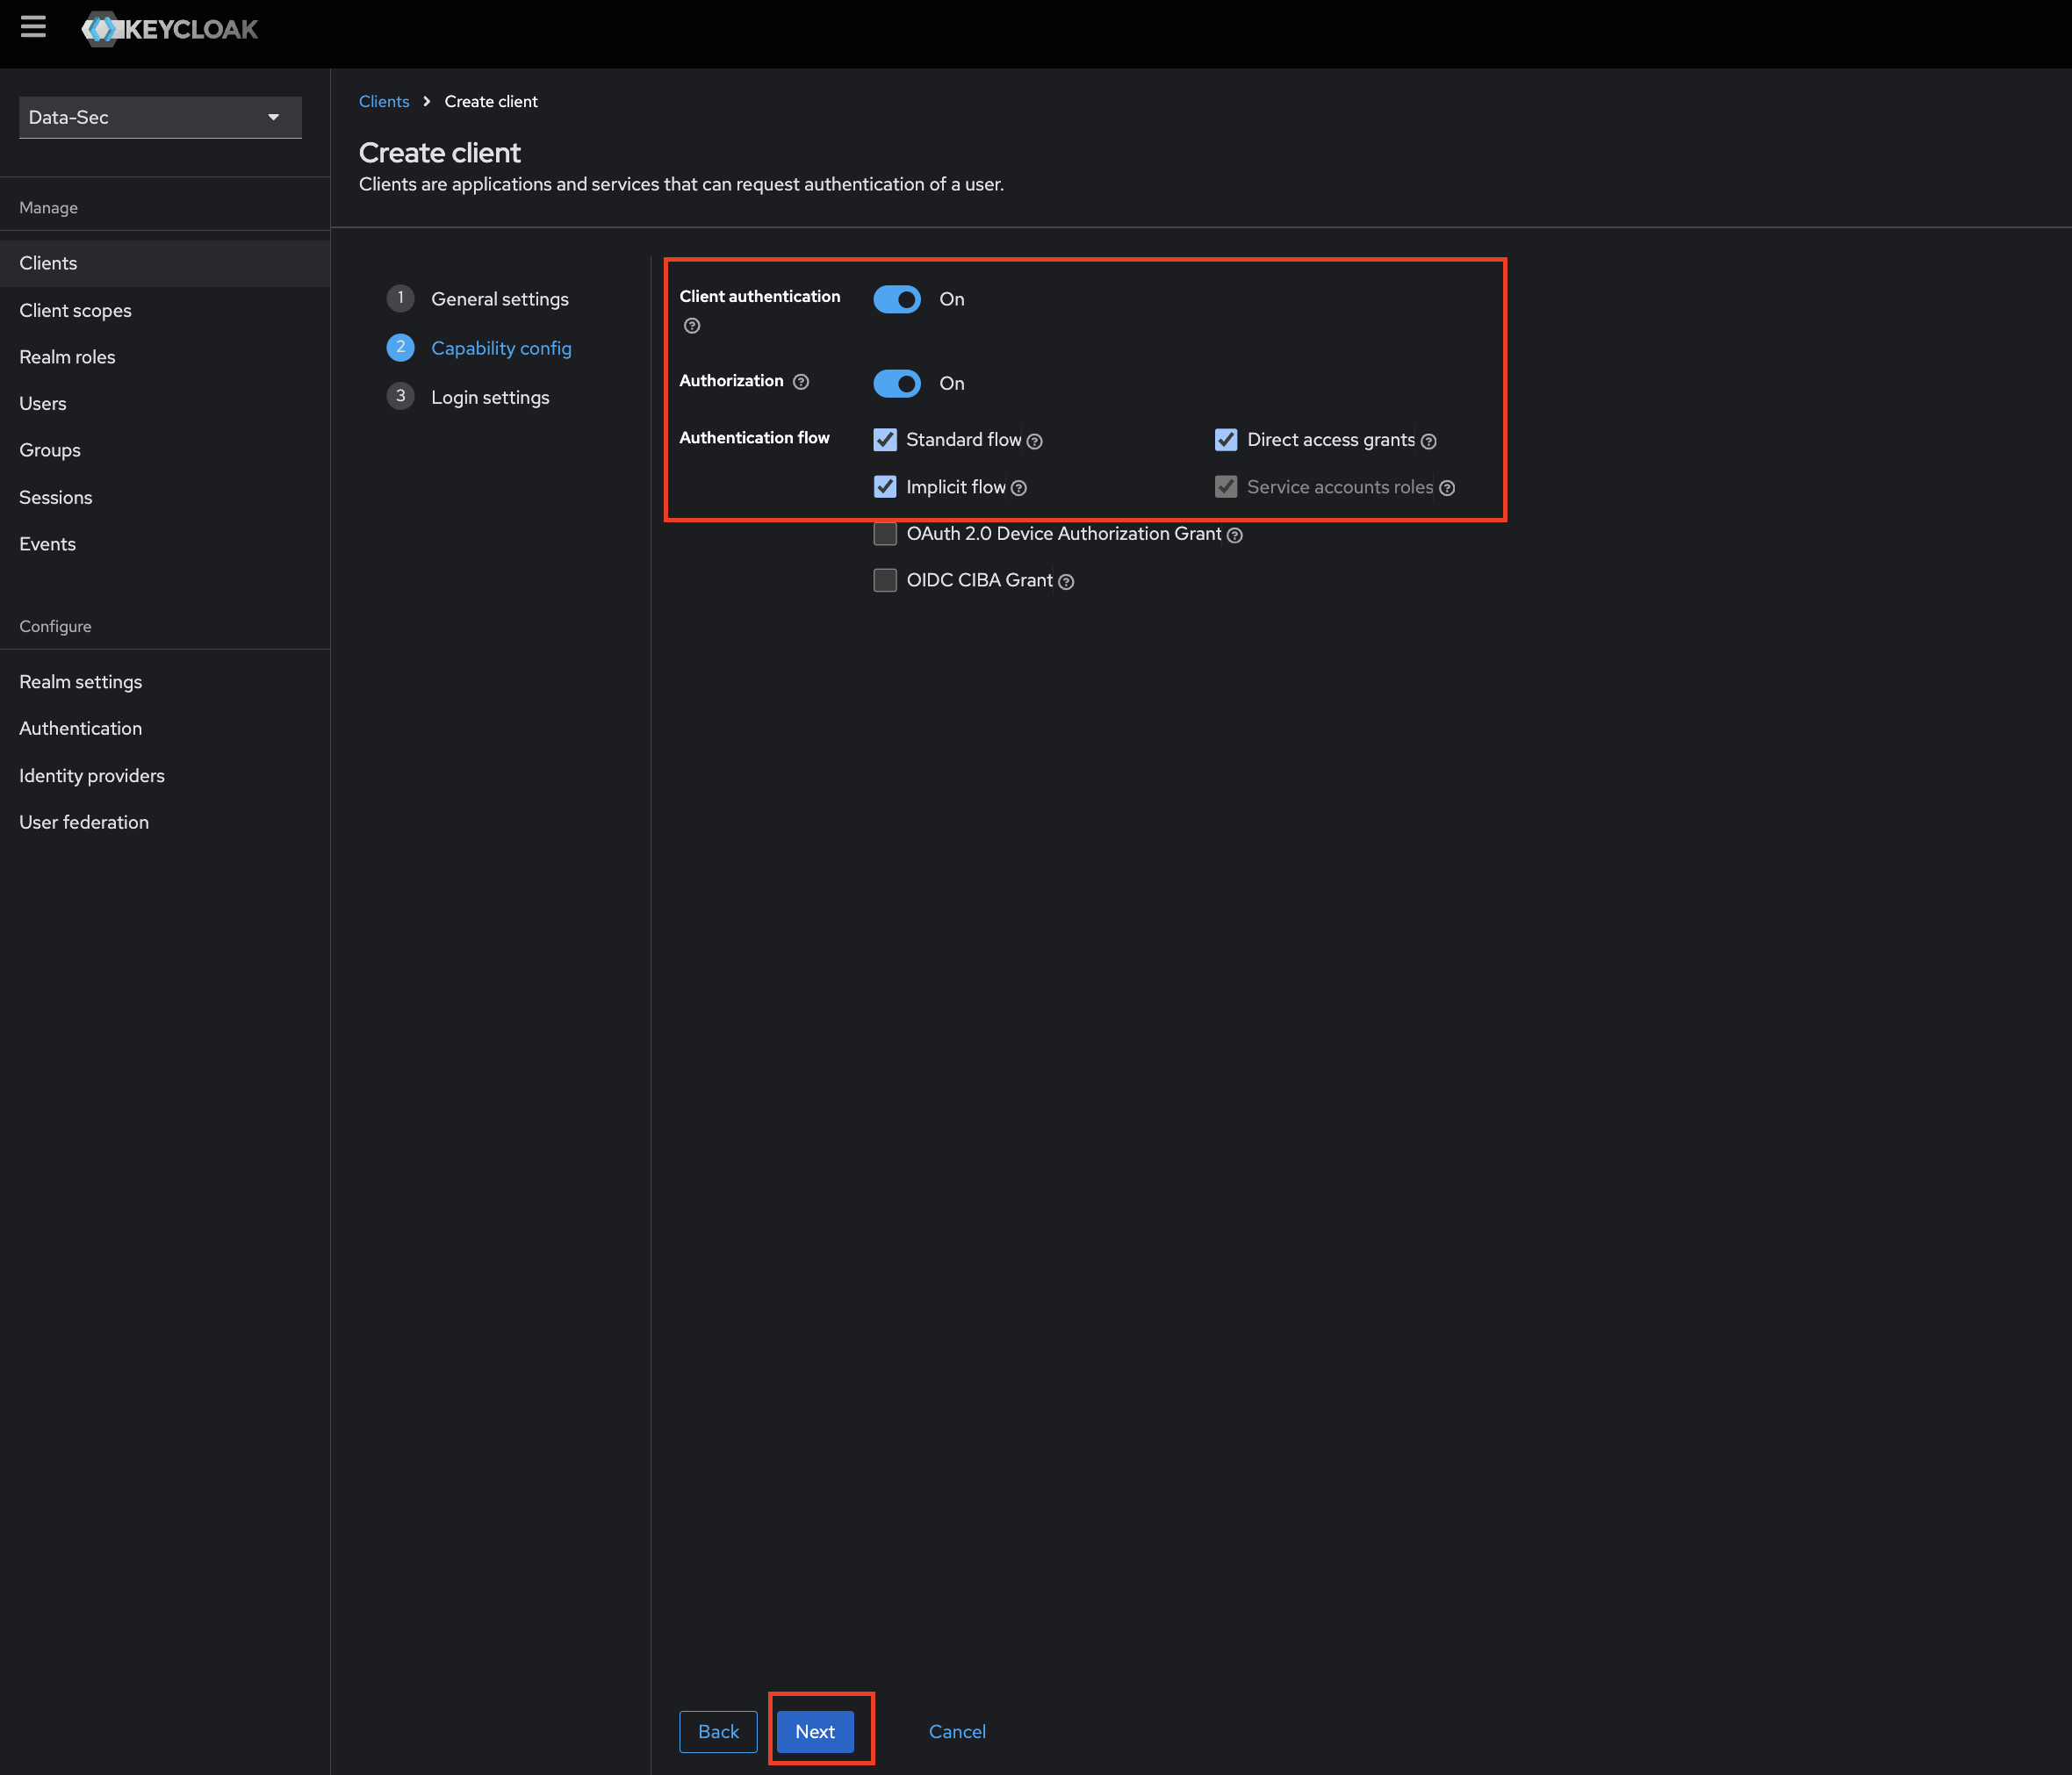
Step 2: Edit Configs of the client
- Enable
Client authenticationandAuthorization. - Select
Standard flowas anAuthentication flow. - Click
Next.
Step 3: Add Login Settings
- fill the required options
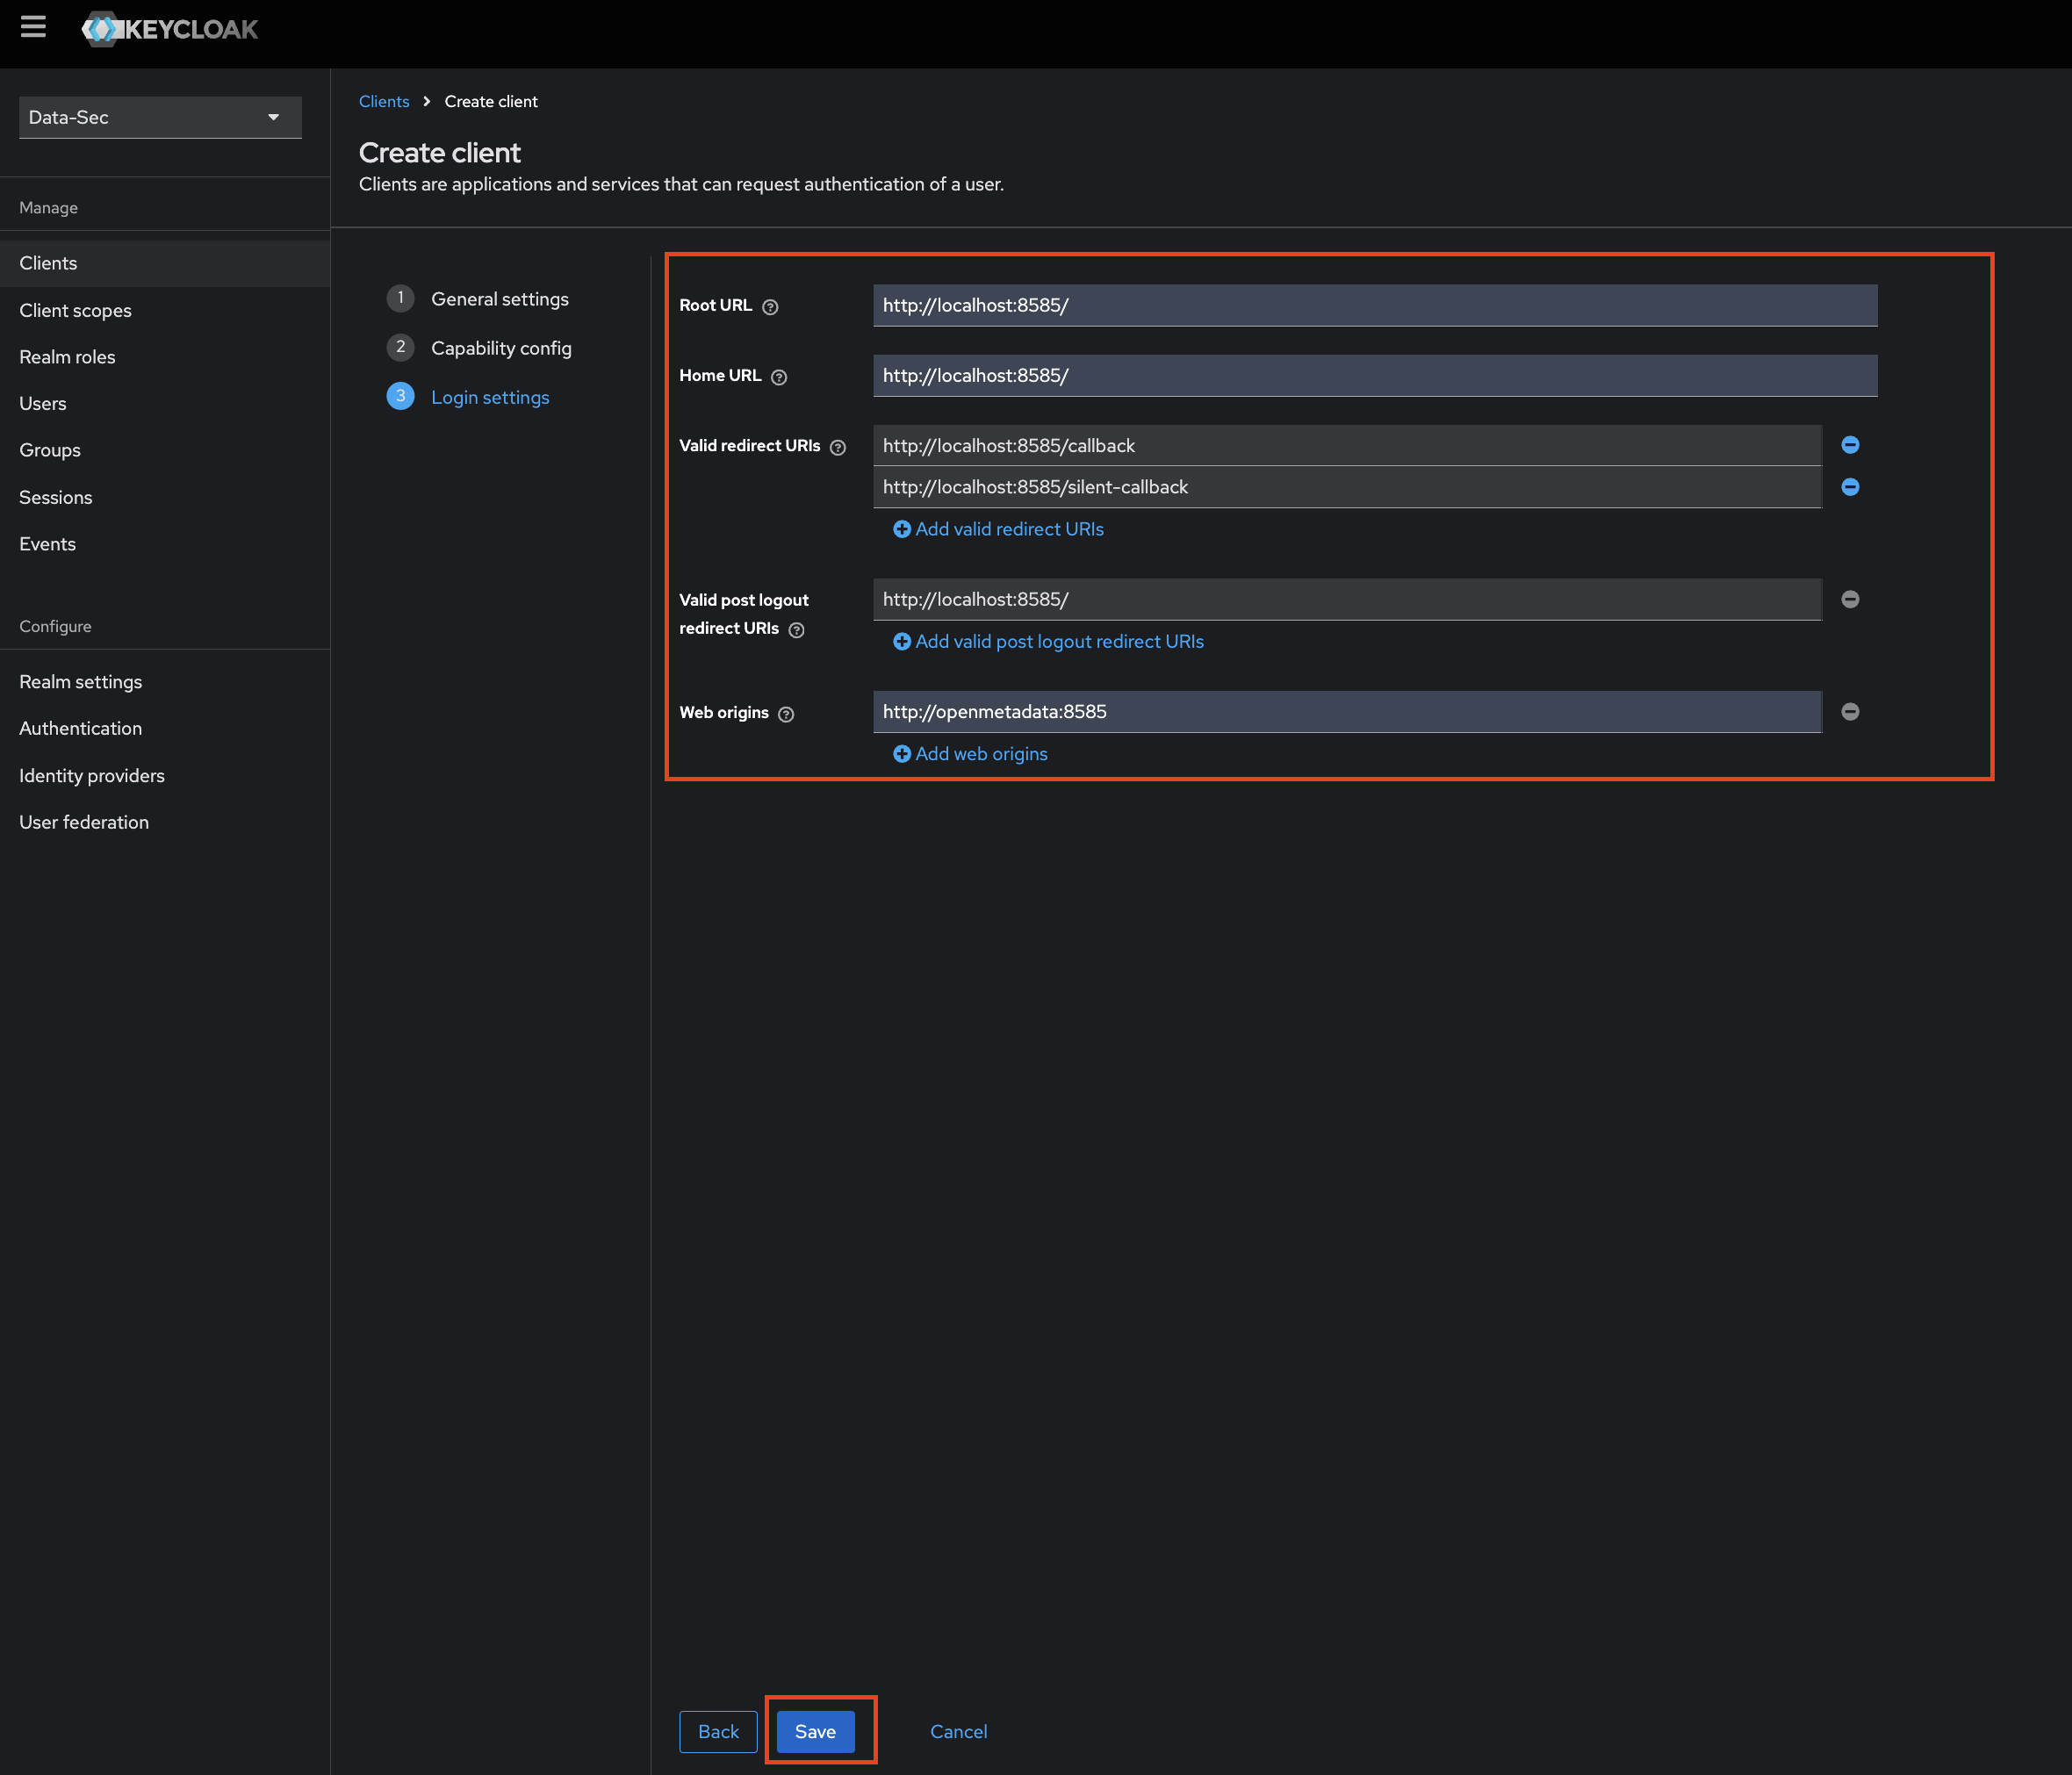
- Click on
Savebutton.
Note: Scopes openid, email & profile are required to fetch the user details so you will have to add these scopes in your client.
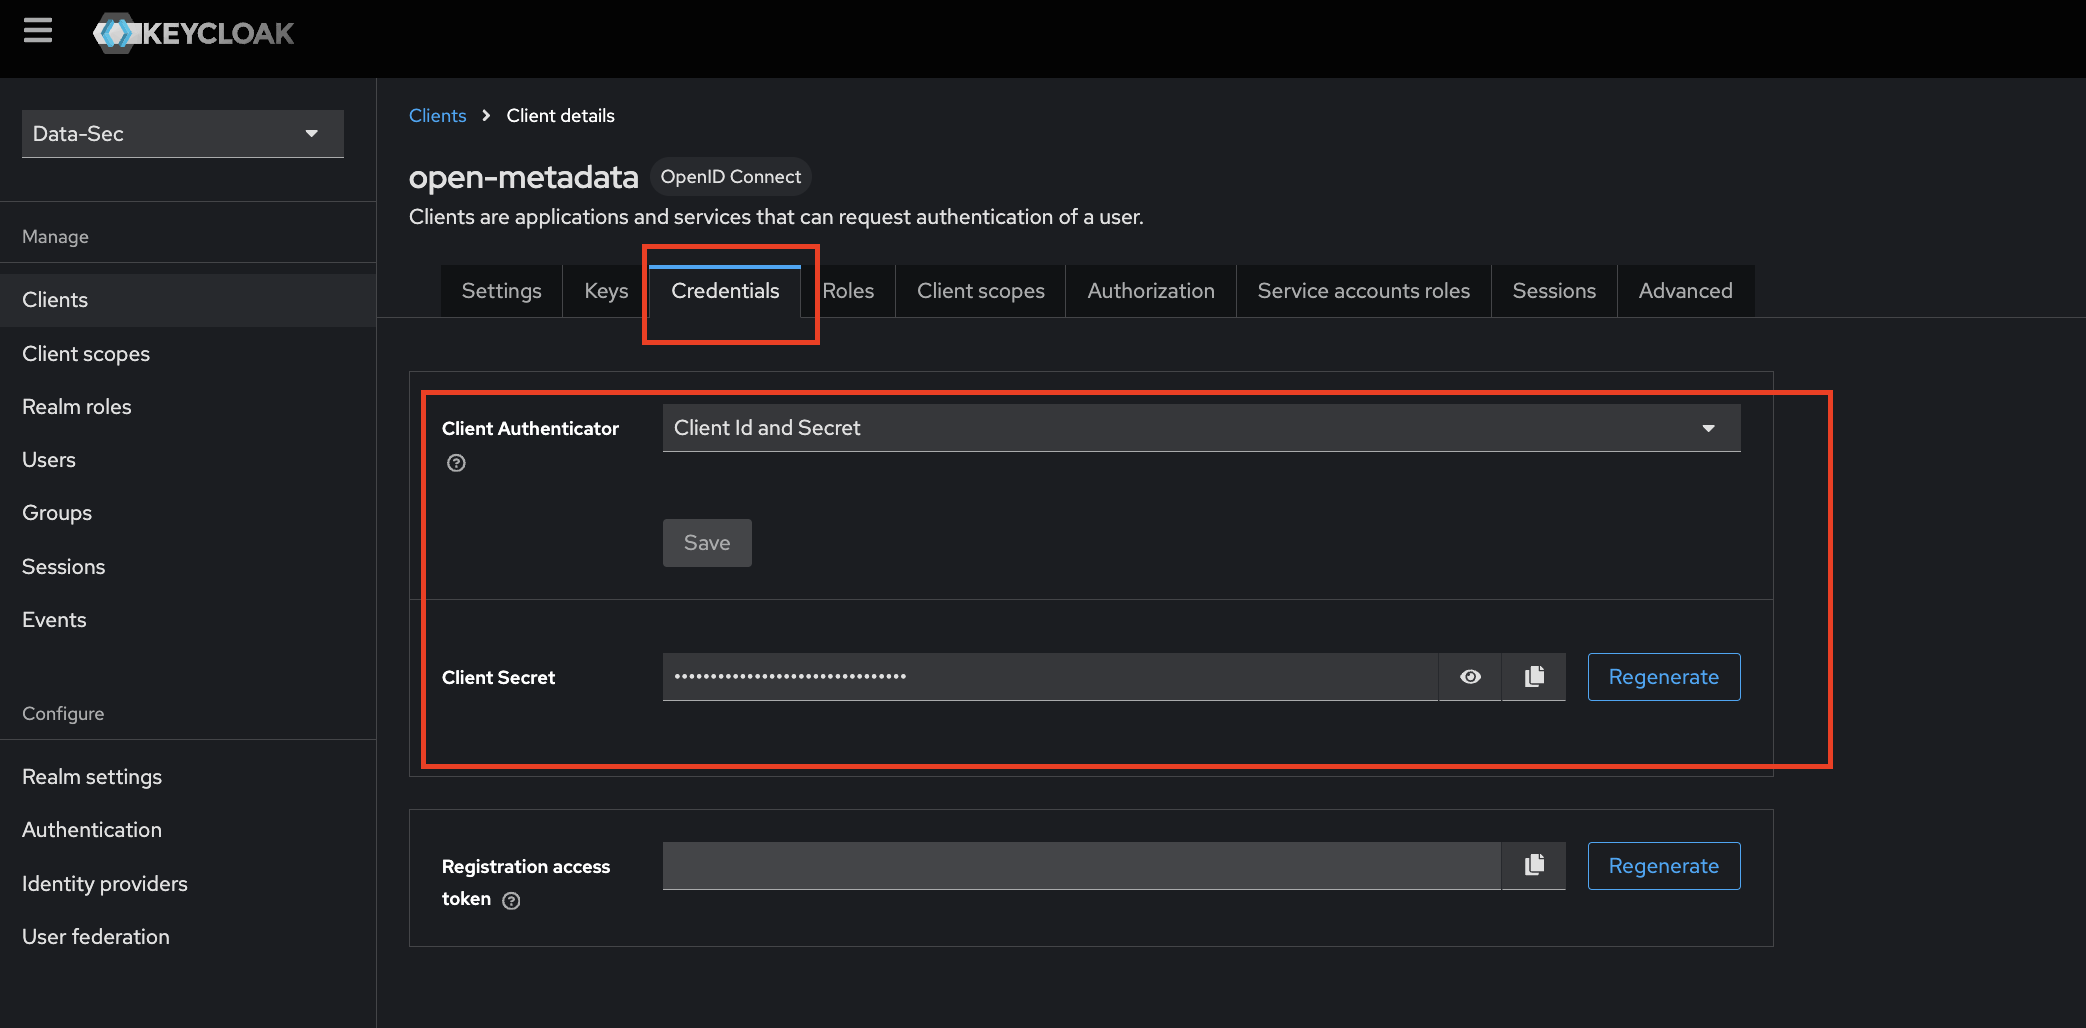
Step 3: Where to Find the Credentials
- Navigate to the
Credentialstab. - You will find your
Client Secretrelated to the Client id "open-metadata"
After the applying these steps, the users in your realm are able to login in the openmetadata, as a suggestion create a user called "admin-user". Now you can update the configuration of your deployment: